


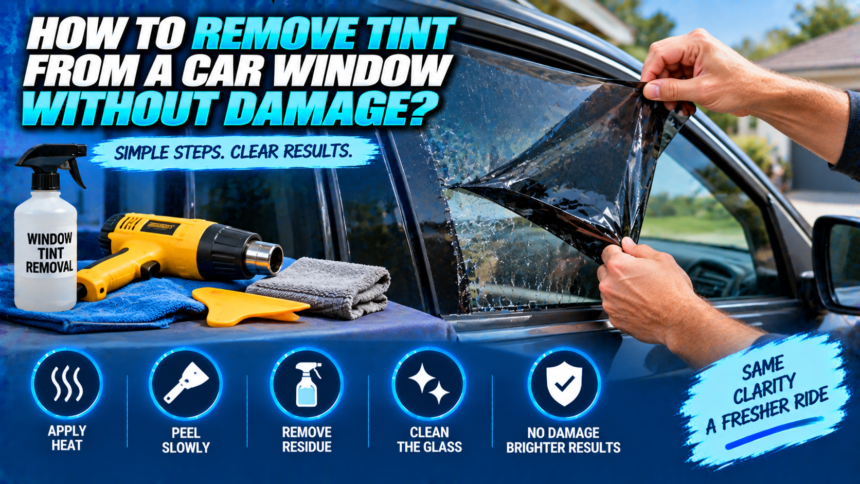
Heat softens the adhesive and the film peels away in one piece. That is the entire principle, and every method is just a different way of applying heat. A handheld garment steamer is the safest and most effective tool, an ammonia and sunlight soak is the backup, and a heat gun works but carries more risk than it is worth on most jobs.
Budget two to four hours for a whole car if the film is in reasonable condition, or $50 to $200 to have a shop do it. One rule matters more than any technique: never put a metal blade on the rear window.
The rear window rule, first
Those thin orange or brown lines running across your back glass are the defroster grid, and they are not embedded in the glass. They are conductive paint silk-screened onto the inside surface, which is the same surface the tint is stuck to. A metal razor takes a line off in one stroke, and that section of the defroster then stops working permanently. Some vehicles also have the radio antenna printed on the same surface, so a careless scrape can cost you reception as well.
The practical rule that follows: side windows will tolerate a metal blade used carefully, the rear window gets plastic tools only, and the rear window is where steam earns its money. Most of the damage people do happens in the first five minutes of a rushed attempt, before the adhesive has had time to soften and while they are still pulling hard.
What you need
- A handheld garment steamer. Around $30 to buy or rentable by the day, and the single most useful item on this list.
- Plastic razor blades, which cost very little and are the only scraper that belongs near a defroster grid
- A spray bottle, and household ammonia or an ammonia-based glass cleaner if you are using that method
- Black plastic garbage bags, cut roughly to the shape of each window
- A dedicated adhesive remover for the residue stage
- Ammonia-free glass cleaner and clean microfiber towels for finishing
- Old towels or plastic sheeting to protect the parcel shelf, door cards, and seats
- Gloves and eye protection, particularly for the ammonia method
Method one: steam
This is the method to use if you have any choice about it. Steam heats the adhesive evenly rather than creating a hot spot, which means no risk of cracking glass or warping trim, and it is safe to use directly over a defroster grid.
- Protect the interior. Steam produces a lot of condensation, and softened adhesive drips. Towels over the parcel shelf, the door cards, and the seat backs.
- On door windows, lower the glass about a quarter of an inch so you can reach the top edge of the film.
- Hold the steamer an inch or two from the glass and work in slow vertical sweeps. Door windows need a couple of minutes. The rear window wants five to ten minutes per section, and some people prop the steamer inside with the doors shut to build heat before starting.
- Lift one corner with a plastic razor or a fingernail. If it does not want to lift, it is not hot enough yet.
- Peel slowly at a shallow angle, keeping steam on the line where the film separates from the glass. Tearing means you are pulling faster than the adhesive is releasing, so slow down rather than pulling harder.
- Work across the window aiming to take the film off in one continuous piece. One piece means dramatically less adhesive left behind, which is the difference between a half-hour cleanup and a two-hour one.
Method two: ammonia and sunlight
The backup when you do not have a steamer, and genuinely effective on a hot, sunny day. It is slower and messier, and it needs more care.
- Park in direct sunlight and protect the interior thoroughly.
- Cut black garbage bags roughly to the shape of each window.
- Wet the outside of the glass and press a bag onto it so it clings. The black plastic traps heat against the window.
- Spray the inside of the film generously with ammonia until it is saturated.
- Cover the inside with a second bag to stop the ammonia evaporating before it can work.
- Leave it for one to two hours in the sun, then remove the bags, lift a corner and peel.
Take the ammonia part seriously rather than treating it as a household cleaner. Concentrated fumes in an enclosed car are a respiratory irritant, and the CDC’s fact sheet on ammonia sets out what exposure does, including burning in the nose, throat and eyes. Work with the doors open between soaking sessions, wear gloves and eye protection, and step away for fresh air regularly.
The rule that matters most: never mix ammonia with bleach or with any product that contains it. The reaction produces chloramine gas, which causes coughing, chest pain, shortness of breath, and in a confined space can do real damage. Use one product at a time, and air the car thoroughly before you drive it.
Method three: heat gun or hair dryer
It works, but it leaves more adhesive behind than steam and introduces risks the other methods do not have. Uneven heating can crack glass, and a heat gun held too close will warp or melt the plastic trim around the window and mark a door card permanently.
If you use one, keep it roughly six inches back and keep it moving constantly, never dwelling on one spot. A hair dryer is slower and considerably safer, which makes it a reasonable choice for a single door window and a poor choice for a whole car.
The adhesive is most of the job
How much residue you face depends entirely on how the film came off. Film that peeled in one sheet with good heat often takes most of its adhesive with it. Film that came away in flakes leaves nearly all of it behind.
- Spray the glass with adhesive remover or an ammonia solution and let it dwell for several minutes rather than attacking it immediately
- Work the softened adhesive off with a plastic razor, keeping the surface wet the entire time. Dry scraping is what scratches glass and catches defroster lines.
- On side windows only, superfine 0000 steel wool dipped in soapy water lifts stubborn patches without scratching automotive glass. Never use it on the rear window.
- Re-wet and repeat rather than pressing harder. Adhesive comes off with dwell time, not force.
- Finish with ammonia-free glass cleaner and a clean microfiber, then check the glass in low sun, which shows up any haze you have missed
Old film is a different job entirely
Tint that has turned purple-brown, bubbled, or gone crazed has had its adhesive chemically break down and its polyester layer turn brittle. It will not peel. It shatters into small pieces as you pull, and almost all the adhesive stays welded to the glass.
You can identify it before you start: pick at an edge and see whether it flexes or flakes. If it flakes, multiply your time estimate by three or four, and seriously consider paying someone. This is the scenario where DIY removal turns into a lost weekend and a scratched rear window, and it is also the most common reason people are removing film in the first place.
What it costs to have done
Professional removal generally runs $50 to $200 for a car, or roughly $15 to $25 per window, with degraded film at the top of the range because it takes so much longer.
The useful thing to know is that shops almost always discount removal heavily, or fold it in, when you are having new film installed at the same time. They need the glass perfectly clean before new film goes on regardless, so they would rather do the removal themselves than inherit someone else’s half-finished attempt. If new tint is the plan anyway, get both quoted together.
Paying is worth it when the rear window is involved and you are not confident, when the film is old and degrading, or when you would have to buy tools you will use once.
Before you put new film on
If the reason you are removing tint is that it was too dark for where you live, check the actual numbers before buying a replacement rather than guessing. Front side window limits vary enormously between states and they are the ones that get enforced at the roadside. The International Window Film Association maintains the state-by-state charts, and it takes two minutes.
The other thing to know is that new film will not adhere properly to glass with adhesive haze still on it, and it will show every speck left behind. If you are doing the removal yourself and having a shop install, expect them to inspect the glass and possibly charge to re-clean it. Getting the residue stage genuinely finished is what makes the DIY saving real.
Conclusion
Use a steamer if you can get one, work slowly enough that the film comes off in one piece, and keep metal blades away from the rear window entirely. The ammonia and garbage bag method is a solid backup on a hot day provided you ventilate properly and never bring bleach anywhere near it. Expect the adhesive cleanup to take as long as the peeling, and if the old film flakes rather than peels, getting a quote is the sensible move rather than the defeat it feels like.
Frequently asked questions
Can I remove window tint without a steamer?
Yes. The ammonia and black garbage bag method works well on a hot sunny day, and a hair dryer works on small areas. Both leave more adhesive behind than steam, so expect a longer cleanup stage.
Will removing tint damage my rear defroster?
Only if you use a metal blade or scrape dry. The grid lines are painted onto the inside surface of the glass, so use plastic razors, keep the surface wet, and let steam do the work rather than force.
How long does it take to remove tint from a car?
Two to four hours for a full car with film in decent condition, and considerably longer if it has gone purple or bubbled, since degraded film shatters instead of peeling and leaves almost all its adhesive on the glass.
What is the best thing to remove tint glue?
A dedicated adhesive remover or an ammonia solution, sprayed on and left to dwell for several minutes before working it off with a plastic razor. Keeping the glass wet throughout matters more than the specific product.
Is it cheaper to remove tint myself?
Usually, though the margin is smaller than it looks once you buy a steamer and adhesive remover. If you are having new film fitted, ask the shop to quote removal and installation together, since many discount it heavily as a package.