


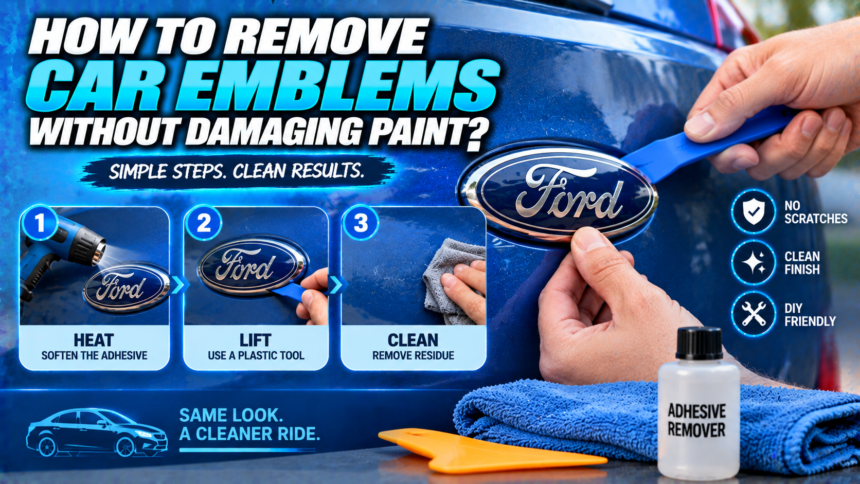
Most car emblems are stuck on with double-sided foam tape, and they come off with warmth, a length of fishing line, and an adhesive remover. Budget about twenty minutes per badge and you will not go far wrong.
The one step worth doing before anything else is checking whether your emblem is taped on or pinned on. Taped badges lift away and leave paint behind. Pinned badges sit on metal studs pushed through drilled holes in the panel, and pulling one of those leaves you with holes that no amount of polishing will fix.
Here is the whole job, in order, including the part that ruins results: the outline the badge leaves behind.
First: taped or pinned?
Press firmly on the middle of the emblem with your thumb.
A taped badge has a little give. You can feel the foam compress underneath, and the edge will flex slightly if you push at it. Nameplates, model designations, trim letters, and dealer badges are almost always taped.
A pinned badge feels rigid and immovable, because it is anchored through the panel rather than sitting on top of it. Manufacturer logos, older badges, and grille emblems are the usual candidates.
Two other checks help. Look for the same badge on the other side of the car or on a parts diagram, which will show mounting studs if they exist. And if the panel is accessible from behind, such as a boot lid or tailgate, look at the inner side for retaining clips.
If you find pins, stop and think. Removing a pinned emblem means filling and repainting the holes, which is a body shop job. Some people fit plastic hole plugs instead, but those are visible.
What you need?
Nothing on this list is expensive, and none of it is optional if you want a clean result.
A hair dryer or a heat gun on its lowest setting. Braided fishing line of around 30 to 40 pound test, or waxed dental floss. Plastic trim tools or plastic razor blades, never metal. An automotive adhesive remover. Isopropyl alcohol. Several clean microfiber towels. Car polish and a wax or sealant to finish.
Painter’s tape is worth adding. Masking a border around the badge protects the paint from the line and from your tools, and it gives you a visual boundary for the heat.
Conditions matter more than technique
Pick your day. This job is much easier at moderate temperature and much riskier at the extremes.
In cold weather the foam tape stays rigid and the adhesive tears rather than shearing, which leaves more residue and takes longer. In direct summer sun the panel is already hot, the clear coat is soft, and adding heat on top of that is how people mark their paint.
Work in shade on a mild day, with the panel cool to the touch before you start. Wash and dry the area first, because dragging a line across grit is the fastest way to put a scratch in the clear coat.
The method, step by step
- Wash and dry the panel, then mask a border around the emblem with painter’s tape.
- Warm the badge for one to two minutes, keeping the heat source moving constantly and six to eight inches away. You want the emblem warm to the touch, not hot. If you cannot rest a finger on it, it is too hot.
- Cut about twelve inches of fishing line and wrap each end once around a finger so it cannot slip.
- Slip the line behind one edge of the badge, pull it taut, and saw with short strokes, working slowly across to the opposite edge. The line shears the foam tape without ever touching the paint.
- If the line stops moving freely, stop pulling and reheat. Forcing it is how badges snap and how lines skid onto paint.
- Lift the emblem away once the tape releases. Use a plastic trim tool at the edge if it needs help, never a screwdriver.
- Let the panel cool completely before you touch the residue.
That last point is skipped constantly. Heat softens clear coat as well as adhesive, and working a soft panel with solvents and pressure is where marring happens. Give it ten minutes.
Getting the adhesive off
You will be left with a strip of soft grey foam and glue where the badge was. There are three ways to deal with it, in increasing order of both speed and risk.
Adhesive remover and a plastic razor. Spray the residue, wait a minute for it to soften, then lift it with a plastic razor blade held at a shallow angle. Repeat on stubborn patches rather than pressing harder. This is the slowest method and the safest.
Rolling it off with your thumb. Warm residue often rolls into little balls under firm thumb pressure, the same way rubber cement does. It costs nothing, damages nothing, and clears a surprising amount.
An eraser wheel. A rubber wheel on a drill strips adhesive by friction rather than abrasion, and it is what body shops use. It is also the method most likely to burn paint in inexperienced hands.
If you use a wheel, the manufacturer’s own numbers matter. 3M’s Stripe Off Wheel is rated to a maximum of 4,000 rpm, and exceeding that compromises how it works. Keep it moving, use light pressure, and stop before the panel gets hot, because the friction that removes the glue also generates heat.
One warning deserves highlighting. 3M’s removal instruction bulletin states that these wheels are not recommended on thermoplastic paints, meaning acrylic or nitrocellulose lacquers. If your car is old enough to wear original lacquer, do not put a wheel anywhere near it. The same bulletin suggests finishing with a general purpose adhesive cleaner or isopropyl alcohol.
Whatever method you use, wipe the area down with isopropyl alcohol at the end to strip off any oily film the remover leaves behind.
Ghosting: the part nobody warns you about
Here is the outcome that disappoints people. The badge comes off cleanly, the glue comes off cleanly, and there is still a visible outline of the emblem on the panel.
The cause is simple. The paint under the badge has been shielded from sunlight for the vehicle’s whole life, while the paint around it has been oxidising and fading. Remove the badge and you expose a patch of paint in better condition than its surroundings, and the boundary shows.
How bad it looks depends on three things. Older cars show it more. Dark colours, especially reds and blacks, show it more. And cars that live outdoors show it far more than garaged ones.
Polishing is the fix, and it works by cutting the oxidised layer off the surrounding paint until it matches. A machine polisher does this far better than hand work, because you need to blend a wide area rather than just the outline. On a badly faded panel it may not fully disappear, and at that point the choice is a professional paint correction or living with it.
You can test for it before committing. Look at the panel in bright, raking sunlight and compare the colour right at the badge edge with the colour a foot away. A visible difference there is a preview of what you will get.
Finishing the job
Polish the area, then protect it, and do not skip the second half.
The paint you have just exposed has never seen UV and has no wax on it. Applying a wax or sealant gives it protection and helps it weather at the same rate as the rest of the panel from now on.
Work outward from the badge area rather than just polishing the outline, so any correction blends rather than leaving a shiny patch.
What not to use?
| Avoid | Why |
| Metal screwdrivers or blades | They cut clear coat instantly and permanently |
| A heat gun on high | Softens and can blister paint before you notice |
| Acetone or lacquer thinner | Attacks clear coat as readily as adhesive |
| Kitchen scouring pads | Abrasive enough to leave a haze you have to polish out |
| An eraser wheel on lacquer paint | Not recommended by the manufacturer, and hard to undo |
WD-40 and similar penetrating oils come up constantly as adhesive removers. They do soften residue and they are unlikely to hurt modern clear coat, but they leave an oily film that must be cleaned off before you polish or wax, or nothing will bond afterwards.
Resale, warranty, and going back
Removing badges does not void a warranty, and it is not illegal.
Resale is a mild consideration. A debadged car reads as cleaner to some buyers and as suspicious to others, particularly if the missing badge was a trim designation that proves the car is the higher-spec version. Keeping the emblems in a bag in the boot solves that, and takes ten seconds.
Refitting is straightforward if you kept them. New badge tape is sold as pre-cut sets for common models, or you can cut your own from automotive-grade double-sided foam tape. Clean both surfaces with isopropyl alcohol first, position carefully because the tape grabs immediately, and press firmly for thirty seconds.
If ghosting has already set in, refitting the badge hides it again, which is worth knowing before you polish for an hour.
Conclusion
Check for pins before you touch anything, because that decision changes the job from twenty minutes to a body shop visit. For a taped badge, work on a mild day in the shade, warm it gently, cut the foam tape with fishing line, let the panel cool, then take the residue off with adhesive remover and a plastic blade. Expect an outline where the paint underneath has not faded, polish it out, and wax what you have exposed.
Frequently asked questions
Will removing an emblem damage my paint?
Not if you use heat, fishing line, and plastic tools. Damage comes from metal blades, excessive heat, or working a hot panel with solvents. The most common outcome is a faint outline rather than a scratch.
How do I know if my emblem has pins?
Press the centre firmly. A taped badge gives slightly, a pinned one feels solid. Nameplates and dealer badges are almost always taped. Manufacturer logos and grille emblems are the ones to check carefully.
What removes emblem adhesive best?
An automotive adhesive remover with a plastic razor blade is the safest option. An eraser wheel on a drill is faster but riskier, and it is not recommended on older lacquer paint.
Why is there an outline left after removing my badge?
The paint under the badge was shielded from sunlight while the paint around it faded. Polishing the surrounding area removes the oxidised layer and blends the two, though heavily faded panels may not fully match.
Can I put the emblems back on?
Yes. Clean both surfaces with isopropyl alcohol, apply automotive double-sided foam tape or a pre-cut badge tape set, position it carefully, and press firmly. Keep the originals in case you sell the car.
Related Articles
How to Remove Tint From a Car Window Without Damage?
Does Driving a Car Charge the Battery? What to Know
How Long Can a Car Sit Before the Battery Dies?