



The Cerakote Ceramic Headlight Restoration Kit clears up foggy, yellowed headlights and then seals them with a ceramic coating that blocks UV, so the fix holds for years instead of months. One kit does two headlights, costs around $20, and takes about 30 minutes by hand with no power tools. The sealing step is the part that sets it apart from the cheaper kits. Most kits sand the haze off and stop there, which leaves bare plastic facing the sun again. This one adds a bonded top coat, and that is what makes the clarity last.
- What is the Cerakote headlight restoration kit?
- Will it work on your headlights?
- What comes in the kit
- How to use the Cerakote headlight restoration kit
- How long does it last?
- Why the ceramic coating step matters
- How it compares to other ways to fix foggy headlights
- Getting the best result
- Keeping headlights clear after the coating cures
- Who it is for
- What it costs
- Conclusion
- Frequently asked questions
- Related Articles
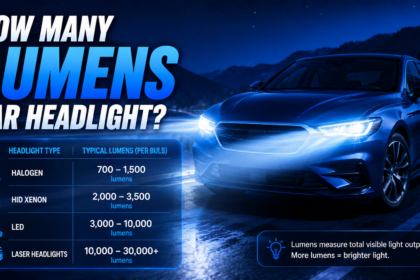
Clearing them up is a safety win as much as a looks one. A clouded lens scatters the beam and cuts how far down the road you can see at night, so a fresh, clear lens puts real light back where you need it.
What is the Cerakote headlight restoration kit?
It is a three-step DIY kit for restoring cloudy plastic headlights. Headlight lenses are made of polycarbonate with a thin factory coating on top. Sunlight breaks that coating down over a few years, and the plastic underneath turns yellow and hazy. The kit strips off that damaged layer, then lays down a fresh ceramic coating that chemically bonds to the lens.
Cerakote is better known for the ceramic coatings used on firearms and engine parts, and this kit brings the same idea to headlights. The coating is a true ceramic, not a wax or a polish, so it bonds to the surface and shrugs off UV rather than washing away. You restore both headlights with one kit, and the whole job is done by hand on the car, start to finish, in a driveway.
Will it work on your headlights?
Before you buy, check what kind of damage you have. This kit fixes surface oxidation, the yellow or milky haze that sits on the outside of the lens. You can confirm it is surface damage with a quick test. Wet the lens with water, and if the cloudiness clears for a second while the glass is wet, the haze is on the surface and the kit will handle it. If the lens still looks foggy when wet, the damage is probably on the inside of the housing, from moisture or a failed seal, and no outside treatment can reach it. Fine cracks, deep crazing, and chips are also past what sanding can fix, since the pad only works the outer face of the plastic.
What comes in the kit
Everything you need is in the box, so you do not have to buy anything extra. A single kit holds eight oxidation removing wipes for the first pass, one hand sanding pad that you grip, four sanding discs in two grits with two of each, and two pre-moistened ceramic coating wipes, one per headlight. There is no drill, no buffer, and no masking tape in the box, though tape is worth adding yourself, as explained below.
How to use the Cerakote headlight restoration kit
Work on one headlight at a time, in the shade, when the surface is cool. Plan for about 30 minutes for the pair. The three steps are simple, and the order matters.
- Clean and wipe off the oxidation. Wash the headlight with soap and water and dry it. Then use an oxidation removing wipe to strip the loose, chalky top layer. The lens will look a little clearer already, but it is not done.
- Sand the lens. Fit a sanding disc to the pad, wet the surface, and sand the whole lens in even strokes. Start with the coarser grit, then move to the finer one, and keep the lens and the disc wet the entire time. Wipe the milky slurry away now and then to check your progress. When you finish, the headlight will look scuffed and milky, and that is exactly right. The haze means the old coating is gone and the plastic is ready to bond.
- Wipe on the ceramic coating. Dry the lens fully, open one ceramic wipe, and spread the coating across the lens in a single smooth pass, edge to edge, with light overlapping strokes in one direction. Do not go back over an area you have already coated. The lens turns clear as the coating flashes off. Then leave it to cure.
The coating sets fast, so a few rules matter. Use one coat only. A second coat clouds the finish instead of improving it. Do not try to patch a thin spot once it starts drying, because the surface becomes chemically resistant within a minute or two, and a touch-up will not blend in. If you miss a small patch, it is better to live with it than to fight it.
How long does it last?
Done right, the Cerakote coating holds its clarity for years, and the maker backs it with a limited lifetime warranty for as long as you own the vehicle. That is the headline difference from a standard restore. Sand-and-polish kits can look great for a week and then start yellowing again within a few months, because nothing is protecting the bare plastic from the sun. The ceramic layer is the sunscreen the lens lost.
Real-world life depends on prep and climate. A clean sand, a careful single coat, and a garage-kept car in a mild climate will get the longest run. A lens that was already cracked or sanded unevenly, or a car that bakes in direct sun all day, will not do as well. Either way, the protected result far outlasts a polish on its own, which is the whole point of the extra step.
There is no mileage or wash-count rating on the coating, so treat the lifetime warranty as the floor rather than a hard expiry date. The first sign of wear is usually a faint return of haze, which is simply your cue that a new coat is due, not a sign the kit failed.
Why the ceramic coating step matters
The ceramic coating is the reason this kit outlasts the cheap ones. Oxidation is only half the problem. When you sand a hazy headlight clear, you also sand off whatever was left of the factory UV coating. Clear bare polycarbonate looks fantastic for a few days, then the same UV damage starts over, and you are back where you began by the end of the season.
The ceramic wipe replaces that lost protection. It bonds to the plastic and forms a hard, clear top layer that takes the UV hit instead of the lens. So the two things people care about, how clear it looks and how long it stays clear, both come from finishing the job properly. Skipping or rushing the coating step is the most common way a restore fails early, and it is easy to avoid.
How it compares to other ways to fix foggy headlights
Foggy headlights can be handled several ways, and the right one depends on how long you want the fix to hold. Here is how the common options stack up.
| Method | Rough cost | How long it lasts | UV protection after |
| Toothpaste or household polish | A few dollars | Days to weeks | None |
| Basic sand-and-polish kit | $10 to $15 | Weeks to a few months | None |
| Cerakote ceramic kit | About $20 | Years | Yes, bonded ceramic coat |
| Shop or detailer restoration | $70 to $150 | Varies, often months | Depends on the shop |
| New headlight assembly | Hundreds | Life of the part | Factory coating |
The pattern is simple. The options with no coating step look good briefly and then fade, while the ceramic kit and a new assembly are the two that keep protecting the plastic afterward. The kit gets you most of the way to new-assembly clarity for a tiny fraction of the price.
Getting the best result
A few small moves make the difference between a finish that lasts years and one that fails fast. Tape off the paint around each headlight before you sand, because the sanding discs will scuff paint and trim if they wander, and a strip of tape removes that risk. Work in a shaded spot between about 60 and 75 degrees Fahrenheit, since heat and direct sun make the coating flash off too quickly and streak, while a cool, shaded surface gives you a clean, even layer.
Keep sanding until the lens is evenly hazy, with no shiny or yellow spots left, because any patch you miss now will still be yellow under the clear coat later. The dull, even haze is your signal that the lens is ready. Use the kit within a year of buying it, since the ceramic wipes are pre-moistened and sealed and lose their edge if they sit on a shelf too long.
Give the final coat time to cure before you drive in rain or run the car through a wash. Leaving it parked for a few hours in a dry, shaded spot lets the ceramic harden fully, and a surface that cures undisturbed ends up clearer and tougher than one that got splashed too early.
The sanding step is supposed to make your headlights look worse before they look better. A fully hazy lens is the goal, not a mistake. The ceramic coat is what turns it crystal clear in the final pass.
Keeping headlights clear after the coating cures
Once the coating has cured, treating it gently keeps it clear for the long haul. Wash the headlights the way you wash the rest of the car, with normal car soap and water. Skip abrasive polishes, rubbing compounds, and gritty household cleaners, since those can wear into the ceramic layer you just applied. There is no need to wax or seal over the coating, because the ceramic is already the protective layer. If the lens ever starts to dull again after a long time, a fresh kit lays a new coat over a clean sand.
Who it is for
This kit suits anyone with foggy plastic headlights who wants a lasting fix without paying a shop. If your lenses are yellow, cloudy, or dim at night, and the plastic itself is still sound, this is a strong DIY option. It is also a good pick if you have tried a polish before and watched it yellow again, since the coating is the part that was missing the first time.
It is less useful in a couple of cases. Glass headlights do not oxidize the way plastic does, so they do not need it. Lenses that are deeply cracked, crazed with fine internal lines, or damaged on the inside will not come fully clear, because sanding only reaches the outer surface. If the plastic itself is physically broken, replacement is the honest answer.
What it costs
At around $20 for a kit that covers both headlights and lasts years, the cost per year of clear headlights is very low next to the alternatives. A detailer or shop restoration often runs $70 to $150 and may still skip the long-term coating, and new headlight assemblies can cost hundreds. For a sound set of hazy lenses, the kit is the cheapest route to a result that holds. You can read the full specs and warranty terms on Cerakote’s official headlight kit page, and the brand’s headlight FAQ covers curing and conditions in more detail.
Conclusion
The Cerakote Ceramic Headlight Restoration Kit clears foggy headlights in about 30 minutes and, more importantly, seals them with a UV ceramic coating so the clarity lasts for years rather than months. Work in the shade, sand until the lens is evenly hazy, and lay down a single clean coat. Do that and you get bright, like-new headlights and a fix backed for as long as you own the car, all for about $20.
Frequently asked questions
How many headlights does one Cerakote kit cover?
One kit restores two headlights, so a standard car is covered by a single purchase. There is enough oxidation remover and sanding material for both, plus one ceramic wipe per lens.
Do I need a drill or buffer to use it?
No. The whole job is done by hand with the included sanding pad, so no power tools are needed. Plan for about 30 minutes to do both headlights.
Why do my headlights look worse after sanding?
That hazy, scuffed look is normal and necessary. Sanding removes the old damaged coating so the ceramic layer can bond. The final ceramic wipe is what turns the lens clear again.
Can I apply a second coat for extra protection?
No, use one coat only. A second coat clouds the finish, and the surface becomes chemically resistant within a minute or two of drying, so touch-ups will not blend.
How long does the Cerakote coating last?
With careful prep and a clean single coat, the clarity holds for years, and it carries a limited lifetime warranty for as long as you own the vehicle. Shade, heat control, and even sanding all help it last.
Related Articles
How Long Does a Car Wrap Last?
How Much Is It to Replace a Car Bumper?
Steering Wheel Wrap: Types, Cost, and How to Fit One Yourself