


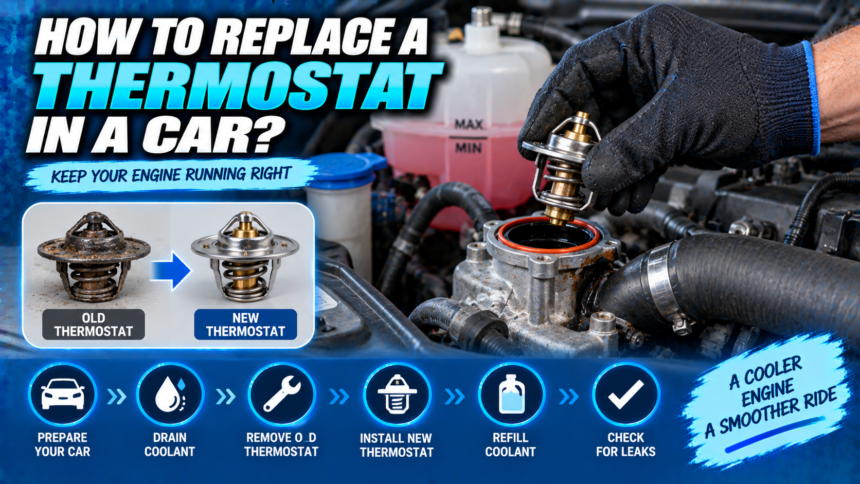
With the engine completely cold, drain enough coolant to get the level below the thermostat housing, follow the upper radiator hose to that housing, unbolt it, lift out the old thermostat, and fit the new one facing the same way with a fresh gasket. Then refill the system and bleed the air out.
- Confirm it is the thermostat first
- Should you do this job yourself?
- What you need?
- How to replace the thermostat, step by step
- Getting the orientation right
- Bleeding the system is the part that catches people
- Testing your work
- If it still overheats afterwards
- Making the next one last
- Conclusion
- Frequently asked questions
- Related Articles
The parts are cheap and the mechanical work is straightforward. Two things decide whether the job actually succeeds: confirming the thermostat is genuinely at fault before you start, and getting all the air out afterwards. Skip either and you will end up back where you began.
Confirm it is the thermostat first
A thermostat is a temperature-controlled valve between the engine and the radiator. It stays shut while the engine warms up, then opens to let coolant through to be cooled. It can fail in two directions, and they produce opposite symptoms.
Stuck closed, coolant never reaches the radiator and the temperature climbs quickly, often within five or ten minutes of a cold start. Stuck open, coolant circulates constantly, so the engine never properly warms, the heater blows lukewarm, and fuel economy suffers.
You can check this without removing anything. Start the engine from cold and feel the upper radiator hose, keeping clear of the fan and belts.
| What you notice | Hose behaviour from cold | Likely cause |
| Overheats within minutes | Upper hose hot, lower hose and radiator stay cool | Thermostat stuck closed |
| Never warms up, weak heater | Both hoses warm at the same rate from the start | Thermostat stuck open |
| Fine on the move, hot in traffic | Both hoses hot, radiator hot | Cooling fan, not the thermostat |
| Gauge erratic, coolant dropping | Varies, often with bubbling in the tank | Leak or air pocket, not the thermostat |
The stuck closed pattern is the clearest signal in the whole cooling system: an engine getting hot while the upper radiator hose stays cool means coolant is trapped in the engine and not reaching the radiator.
Notice the bottom two rows, because they are the common misdiagnoses. A car that cools fine at speed and overheats in traffic has an airflow problem, meaning the fan, and a new thermostat will not touch it. A car with a falling coolant level has a leak. Replacing the thermostat in either case wastes an afternoon.
Low coolant and trapped air also imitate thermostat failure convincingly, so check the level in the expansion tank when the engine is cold before you buy anything.
Should you do this job yourself?
It depends almost entirely on where the thermostat lives on your engine.
On many cars it sits in a housing at the end of the upper radiator hose, reachable from above with a socket set, and the job takes a couple of hours including waiting for the engine to cool. That is a reasonable weekend task.
On others it is buried under the intake manifold, tucked behind the alternator, or built into a plastic housing that also carries sensors and hose stubs. Brittle plastic housings are the specific risk worth knowing about, because an old one can crack as you unbolt it, and that turns a cheap part into a much larger bill.
Look the location up for your exact engine before committing. If you cannot see the housing, or the procedure calls for removing major components, this is a reasonable job to hand over.
What you need?
- The correct thermostat. Matched to your engine, with the same opening temperature as the original. That figure is usually stamped on the old one.
- A new gasket or O-ring. Never reuse the old one. Many thermostats come with the seal fitted.
- Fresh coolant. The specification your manufacturer lists, mixed with distilled water if you buy concentrate. Tap water leaves scale that makes thermostats stick.
- A drain pan and funnel. Two gallons or more of capacity. A long-necked bleeding funnel is inexpensive and makes the refill far easier.
- Sockets, hose clamp pliers, and a plastic scraper. The scraper is for old gasket material, and plastic avoids gouging the sealing face.
How to replace the thermostat, step by step
- Let the engine go completely cold. Not warm, cold. The system is pressurised when hot and opening it will spray scalding coolant.
- Photograph the area before you dismantle anything, including hose routing and any wiring. You will be glad of it during reassembly.
- Position a drain pan and open the radiator drain plug, or release the lower hose if there is no plug. You only need the level below the housing, not the whole system, unless you are changing the coolant anyway.
- Follow the upper radiator hose to where it meets the engine. The housing it bolts to, often called the gooseneck, contains the thermostat.
- Release the hose clamp and ease the hose off. If it is stuck, twist it gently or tap it with something soft rather than levering with a screwdriver, which damages the stub.
- Unbolt the housing, keeping track of bolt lengths if they differ. Lift it off gently. If it is stuck, tap it free with a wooden handle rather than prising, especially on plastic housings.
- Note exactly how the old thermostat sits before you remove it: which way the spring faces, and where any small jiggle pin or bleed hole is positioned. Photograph it in place.
- Scrape the old gasket material off both mating faces with a plastic scraper, then wipe them clean. Any residue left behind will leak.
- Fit the new thermostat in the same orientation as the old one, seated properly in its recess, with the new gasket or O-ring. Lubricate an O-ring with a little coolant.
- Refit the housing and tighten the bolts evenly, working around them rather than fully tightening one at a time. Use the torque figure if you have it, since overtightening cracks housings and warps flanges.
- Reconnect the hose and secure the clamp, then close the drain plug.
Getting the orientation right
This is the mistake that produces a car which overheats worse than before, and it is easy to avoid.
A thermostat is directional. The temperature-sensing element, which is the copper-coloured cylinder containing the wax pellet, must face into the engine where the hot coolant is. The spring side generally faces the engine block. Fitted backwards, the sensing element sits in the wrong flow and the valve never opens correctly.
Most thermostats also have a small jiggle pin or bleed notch on the rim. That should sit at the highest point of the housing, because its job is to let trapped air escape past the closed valve during filling. Getting it at the top makes bleeding considerably easier.
If you photographed the old one in place, simply match it. If you did not, the sensing element goes towards the engine.
Bleeding the system is the part that catches people
Trapped air is the leading reason a thermostat replacement appears to fail. An air pocket sitting against the thermostat stops it sensing coolant temperature properly, and air pockets elsewhere create hot spots.
The result is a car that overheats exactly as it did before, which leads owners to conclude the new part is faulty when the real problem is the refill. Guidance on diagnosing cooling system faults makes the same point about air pockets imitating component failure.
- Fill slowly through the radiator or expansion tank, pausing to let the coolant work its way down rather than pouring it in fast.
- Open any bleed screws on the cooling system while filling and close each one as coolant runs out cleanly without bubbles.
- Set the heater to maximum heat with the blower running, so coolant is drawn through the heater matrix and air there is displaced.
- Run the engine with the cap off, or with a bleeding funnel fitted, until the thermostat opens. You will see the level drop suddenly and coolant begin to circulate.
- Squeeze the radiator hoses gently while it idles to help dislodge trapped pockets.
- Top up as the level falls, then fit the cap once the level holds steady and the heater blows properly hot.
- Let it cool completely and check the level again. It will almost always need more, and this second top-up is the step people skip.
Some engines have no bleed screws and are genuinely awkward to fill by hand. A vacuum fill tool removes the guesswork entirely by evacuating the system before drawing coolant in, which is how shops avoid this problem.
Testing your work
Start the engine and watch the temperature gauge through a full warm-up while the car is stationary. It should rise steadily to the normal position and settle rather than climbing past it.
Feel the upper hose again. It should stay cool while the engine warms, then become hot fairly suddenly as the thermostat opens. That transition is the confirmation you want.
Check the heater blows hot, since weak heat after this job usually means air is still trapped. Then look around the housing for weeping coolant, both while it is running and again once it has cooled and the system has been under pressure.
If it still overheats afterwards
Assume air first and re-bleed the system, ideally after a full heat and cool cycle, which often releases pockets that would not shift initially.
If that does not resolve it, revisit the diagnosis. A cooling fan that does not run, a radiator blocked internally, a weak water pump, or a failing head gasket can all overheat an engine with a perfectly good thermostat. The pattern of when it overheats points at which one, and it is worth checking the fan first because it is easy to test.
Making the next one last
Thermostats rarely fail at random. Old coolant turns acidic and corrodes the wax element and the valve seat, and mineral scale from tap water leaves deposits that make the valve stick.
Change the coolant at the interval in your handbook rather than topping it up indefinitely, use distilled water when mixing concentrate, and treat a temperature gauge that has started to wander as an early warning rather than a quirk.
Conclusion
Confirm the diagnosis with the hose test before spending anything, because a fan fault or a leak produces similar symptoms and a new thermostat will not fix either. Work only on a cold engine, photograph the old thermostat before removing it so the orientation is not in doubt, use a new gasket on clean mating faces, and tighten evenly.
Then bleed the system properly, run it up to temperature, and check the level again once it has cooled. That final top-up is what separates a repair that holds from one that overheats a week later.
Frequently asked questions
How do I know if my thermostat is stuck closed or open?
Feel the upper radiator hose from a cold start. If the engine gets hot while the hose stays cool, it is stuck closed. If both hoses warm together straight away and the engine never reaches temperature, it is stuck open.
Can I drive with a bad thermostat?
Stuck open, briefly, though the engine runs cold and the heater is weak. Stuck closed, no. Overheating can warp a cylinder head or blow a head gasket within minutes, turning a cheap part into a major repair.
Which way round does a car thermostat go?
The temperature-sensing element, the copper-coloured cylinder holding the wax pellet, faces into the engine. Any jiggle pin or bleed notch should sit at the highest point of the housing. Photograph the old one before removing it.
Do I have to bleed the cooling system after replacing a thermostat?
Yes. Trapped air stops the thermostat sensing coolant properly and creates hot spots, producing the same overheating you set out to fix. Run the heater on full, use any bleed screws, and re-check the level once cold.
Can I just remove the thermostat instead of replacing it?
It is a bad idea. Without one the engine never reaches operating temperature, which increases wear, worsens economy, leaves the heater weak, and on modern cars will usually trigger a fault code.
Related Articles
Are Ford’s Reliable? A Complete Honest Breakdown
What to Put Under Tires When Storing a Car?