



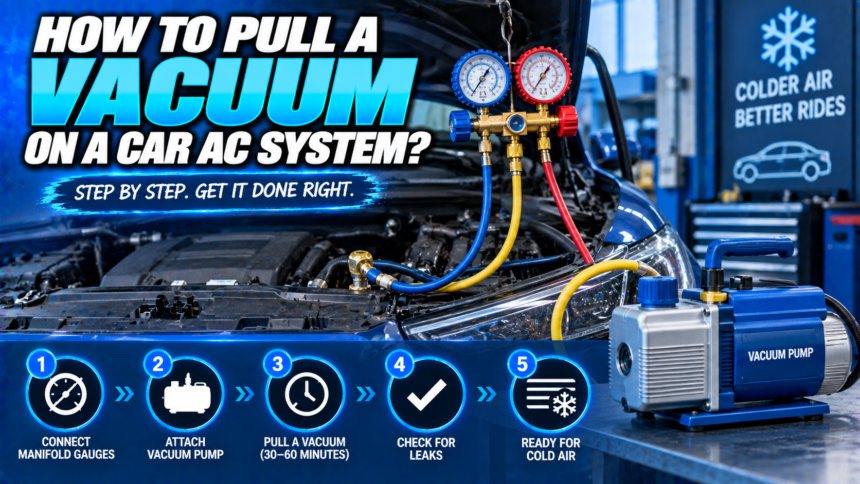
Connect a manifold gauge set to both service ports, run a vacuum pump on the yellow line for at least thirty to forty-five minutes with both valves open, then close the valves, switch off the pump, and watch the gauge. If the vacuum holds steady for fifteen minutes or more, the system is dry and sealed and ready to charge.
- Why the vacuum matters more than it sounds
- Before you start: the system has to be empty
- What you need
- How to pull the vacuum, step by step
- How deep, and why the numbers confuse people
- The decay test is the point of the whole exercise
- Why your pump will not reach a deep vacuum
- What comes next
- Conclusion
- Frequently asked questions
- Related Articles
That last step is the one that matters. Running the pump is easy, and almost everyone gets that part right. Reading what happens after you switch it off is where the useful information is, and it is the part most guides treat as an afterthought.
Why the vacuum matters more than it sounds
Evacuating a system does two jobs, and the second is the important one.
The obvious job is removing air. Air in a refrigerant system is a non-condensable gas, which means it does not change state the way refrigerant does. It occupies volume, raises head pressure, and reduces cooling.
The job that actually justifies the effort is removing moisture. Water inside a sealed refrigerant system reacts with the oil to form acids, and those acids corrode components from the inside out. Moisture can also freeze at the expansion valve or orifice tube and block flow intermittently, which produces a fault that comes and goes and is miserable to diagnose.
A vacuum pump cannot suck water out as a liquid. What it does is lower the pressure until water boils at ambient temperature, so the moisture turns to vapour and the pump can carry it away. At normal pressure water boils at 100 degrees Celsius, but at a deep vacuum it boils well below freezing. That is the entire principle behind the procedure.
You are not vacuuming the system in the household sense. You are lowering the pressure until any moisture inside boils, and then removing the vapour. That is why time matters, and why stopping early leaves water behind.
Before you start: the system has to be empty
This is the prerequisite most guides skip past, and it is not optional.
If there is still refrigerant in the system, it has to be recovered with proper equipment before you open anything. Venting refrigerant to the atmosphere is illegal, and the recovery machine that captures it is the piece of kit a home mechanic will not have. A shop will recover a system quickly and inexpensively, and that is the sensible route.
The situations where you legitimately arrive at an empty system are common enough: a leak has already emptied it, or you have had it recovered before replacing a component. From that point, evacuating and recharging is genuinely a DIY job with the right tools.
One more thing worth doing first. A vacuum will not fix a leak, and pulling one on a system with a known hole is wasted effort. Repair the fault before you evacuate.
What you need
- A vacuum pump. A two-stage pump reaches a deeper vacuum than a single-stage one. Rented pumps are common and perfectly adequate for occasional use.
- A manifold gauge set. Blue for the low side, red for the high side, yellow in the middle for the pump. Make sure the couplers match your refrigerant, since R-134a and R-1234yf use different fittings deliberately.
- Fresh pump oil. Vacuum pump oil absorbs moisture and degrades. Old, cloudy oil will limit how deep the pump can pull, and it is cheap to replace.
- A micron gauge, ideally. Not essential for a home job, but it is the only instrument that shows what is really happening. More on why below.
- Safety gear. Gloves and eye protection. You are working around a system that will shortly be under pressure.
How to pull the vacuum, step by step
- Check the pump oil level and top it up or change it if it looks cloudy. Run the pump for a minute with the intake open to warm it.
- Locate the service ports. The low side has the larger fitting, the high side the smaller, and the caps are usually marked L and H.
- With the manifold valves closed, connect the blue hose to the low side port and the red hose to the high side.
- Connect the yellow hose to the pump inlet. Hand tight is enough on all connections, since the seals do the work and over-tightening damages them.
- Start the pump, then open both manifold valves. Opening both matters, because evacuating through one side alone leaves parts of the system barely touched.
- Watch the low side gauge fall. It should drop quickly at first, then slow as it approaches the pump’s limit.
- Let it run. Thirty to forty-five minutes is the minimum for a system that was opened briefly. If the system has been open to the air for days, or you replaced a large component, run it considerably longer, an hour or more.
- Close both manifold valves first, then switch off the pump. Doing it in that order stops pump oil being drawn back into the system.
- Leave it and watch the gauge for at least fifteen minutes without touching anything.
A note on order in that last step: closing the valves before killing the pump is a small habit that prevents a real problem. A pump that stops while still open to a vacuum can siphon its own oil backwards into the hoses.
How deep, and why the numbers confuse people
You will see two different targets quoted, and they are not in conflict. They are the same measurement at different resolutions.
Inches of mercury is what a manifold gauge shows. At sea level a perfect vacuum is about 29.9 inHg, so a good pump on a sound system will pull the needle close to 29. Altitude reduces what is achievable, roughly one inch per thousand feet, so at higher elevation a lower reading is normal rather than a fault.
Microns are what a digital vacuum gauge shows, and the industry target is 500 microns or below. That is the level at which water boils at around minus twelve degrees Celsius, which guarantees moisture inside the system is vaporising.
Here is the part that catches people out: a manifold gauge cannot resolve 500 microns. The whole micron range sits within the last hair’s breadth of needle movement, so a gauge reading 29 inHg tells you almost nothing about whether the system is dry. This is why professionals use a separate micron gauge, and why correct use of a vacuum gauge recommends placing it on the system rather than next to the pump, since the pump end always looks better than the system does.
For a home repair, an analogue gauge plus generous running time is a reasonable compromise. Just understand that you are using time as a substitute for measurement, which is why the advice is to run longer than feels necessary.
The decay test is the point of the whole exercise
Once the pump is off and the valves are closed, the system is sealed under vacuum and it will tell you its condition for free. This is the most valuable fifteen minutes of the job.
| What the reading does | What it is telling you |
| Holds steady | System is dry and sealed. Ready to charge |
| Rises slowly, then levels off | Moisture still boiling off. Keep pumping |
| Rises steadily and does not stop | A leak. Find it before going any further |
| Shoots straight back to zero | A large leak, or a hose connection that is not sealing |
The distinction between the second and third rows is what makes this test worth doing. Moisture boiling off produces a rise that slows and then stops, because there is a finite amount of water and the pressure stabilises once it has vaporised. A leak produces a rise that keeps going, because atmosphere is endlessly available.
If the reading climbs and settles, put the pump back on and run it longer. If it climbs without stopping, you have a leak, and charging the system now simply means the refrigerant escapes and you repeat the whole job.
Before condemning the car, check your own equipment. Loose couplers, a perished hose gasket, or a manifold valve not fully closed will all mimic a system leak convincingly. Cap the hoses off at the pump and test the gauge set on its own if you are unsure.
Why your pump will not reach a deep vacuum
This is the most common frustration with the job, and the cause is usually not the car.
Contaminated pump oil is the leading culprit. It absorbs moisture, and once it does the pump can no longer reach its rated vacuum. If the oil looks milky, change it, and on a long evacuation change it partway through.
After that, look at the hoses. Standard hoses have rubber gaskets that harden with age and leak under vacuum even when they seal fine under pressure. Cheap hose sets are a frequent limitation. A single-stage pump will also plateau far higher than a two-stage one, which is worth knowing before blaming the system.
Ambient temperature matters more than people expect too. On a cold day, moisture inside the system boils more reluctantly, so evacuation takes longer. Working in a warm garage genuinely speeds the job up.
What comes next
With a vacuum that holds, the system is ready to charge. Do not break the vacuum first, since the vacuum is what draws the refrigerant in.
Charge by weight, to the figure on the label under the bonnet, using a scale. This is where topping up by gauge pressure alone falls down, because an undercharged system cools poorly and an overcharged one raises pressures, cools worse, and strains the compressor.
If you replaced a component that holds oil, such as the compressor, condenser, or drier, the correct amount of refrigerant oil goes in before charging. The drier or accumulator is usually replaced whenever the system has been open for any length of time, since its whole purpose is absorbing moisture and it saturates once exposed to air.
Conclusion
Make sure the system is genuinely empty and any leak is repaired, then connect both sides, run the pump for at least thirty to forty-five minutes, and close the valves before switching it off. Then stop and watch. A vacuum that holds steady means dry and sealed; one that rises and settles means keep pumping; one that rises without stopping means find the leak. That fifteen minutes of watching tells you more about the system than the previous hour of pumping did.
Frequently asked questions
How long should I vacuum a car AC system?
Thirty to forty-five minutes minimum for a system opened briefly, and an hour or more if it has been open for days or you replaced a large component. The decay test afterwards matters more than the exact running time.
Can I pull a vacuum without a vacuum pump?
Not properly. Some methods use the car’s own compressor or a venturi tool, but neither reaches a deep enough vacuum to boil off moisture. Renting a pump is inexpensive and gives a result worth having.
What vacuum reading should I aim for?
As close to 29 inHg as your altitude allows on a manifold gauge, or 500 microns or lower on a digital vacuum gauge. A manifold gauge cannot actually resolve the micron range, which is why running time is used as a proxy.
Should both manifold valves be open while evacuating?
Yes. Opening only the low side leaves parts of the system poorly evacuated. Open both, then close both before switching the pump off so oil is not drawn back into the hoses.
My vacuum will not hold. Does that always mean a leak?
No. If the reading rises and then levels off, moisture is still boiling off and the system needs longer on the pump. Only a rise that continues towards atmospheric pressure indicates a genuine leak. Check your hoses and couplers too.
Related Articles
How to Put Brake Fluid in a Car: Do This First
How Long Can a Car Sit Before the Battery Dies?
How Many Engine Mounts Does a Car Have?
How to Remove Car Emblems Without Damaging Paint?